Disciple.Tools User Documentation
Creating a Workflow
Follow these steps to create a new workflow in Disciple.Tools. Before you start, decide which record type it applies to, when it should run (trigger), and what conditions and actions you want.
Prerequisites
- You have opened the Workflows page and selected a post type (for example Contacts or Groups). See Accessing the Workflows Page and Workflows Page Overview.
- You know the trigger (record created or field updated), the conditions (if any), and the actions you want.
Step 1: Select the Post Type
If you have not already done so, click one of the post type buttons at the top (for example Contacts or Groups) so that the workflow list and design panel apply to that record type.
Step 2: Open the New Workflow Form
Click the New Workflow button. The design panel appears with Step 1 visible.
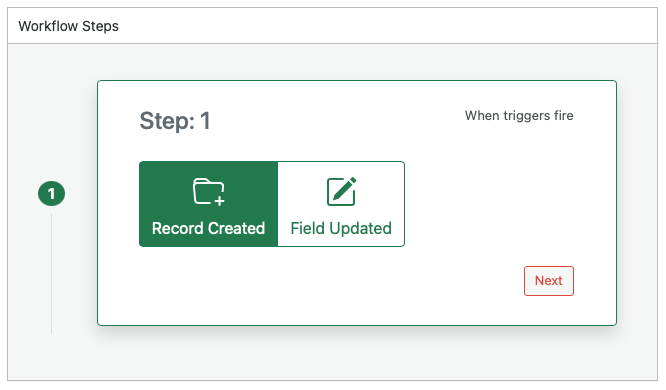
Step 3: Choose the Trigger (Step 1)
- Choose when the workflow should run:
- Record Created: Runs when a new record of this type is created.
- Field Updated: Runs when one or more fields on an existing record are updated.
- Click Next to go to Step 2.
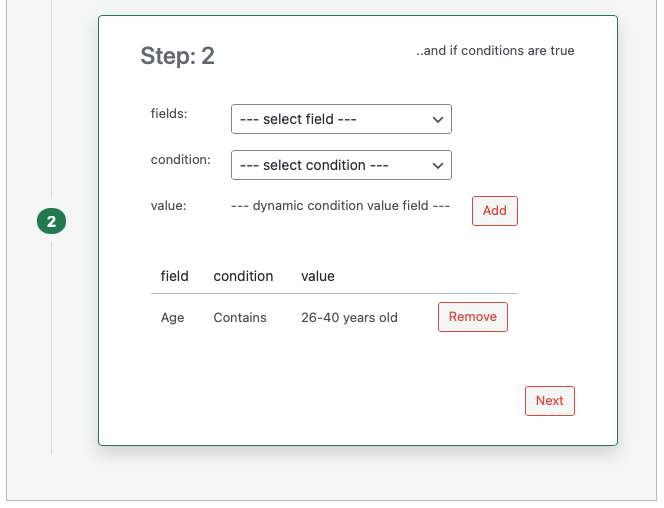
Step 4: Add Conditions (Step 2)
Conditions are optional. If you add them, the workflow runs only when every condition is true.
- In fields, select the field to check (for example Status or Assigned to).
- In condition, select the rule (for example Equals, Contains, or Has any value and not empty). The list of conditions depends on the field type you chose.
- If the condition needs a value (for example “Equals” needs a value to compare), enter or select the value in value. For “Has any value and not empty” and “Has no value or is empty” you do not enter a value.
- Click Add to add this condition to the table.
- Repeat for each condition you want. You can remove a row using the Remove button next to it.
- Click Next to go to Step 3.
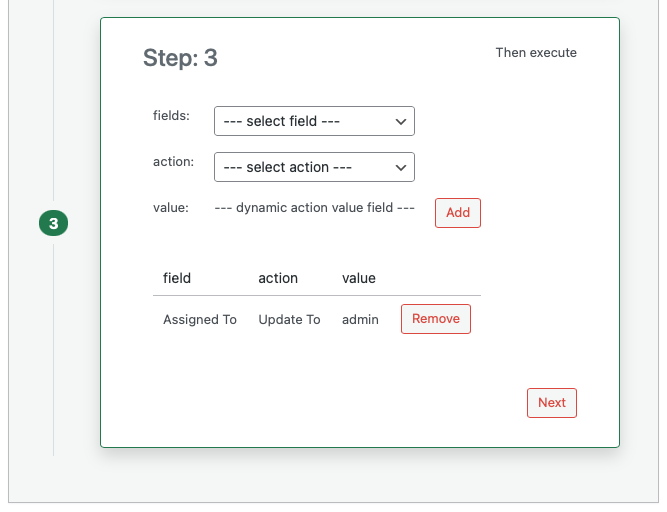
Step 5: Add Actions (Step 3)
Actions are what the workflow does when the trigger and conditions are satisfied.
- In fields, select the field to change or the special action (for example a field like Status, or Comments).
- In action, select what to do (for example Updated To, Appended With, or Add Comment). The list of actions depends on the field you chose.
- If the action needs a value (for example “Updated To” needs the new value), enter or select it in value.
- Click Add to add this action to the table.
- Repeat for each action you want. You can remove a row using the Remove button next to it.
- Click Next to go to Step 4.
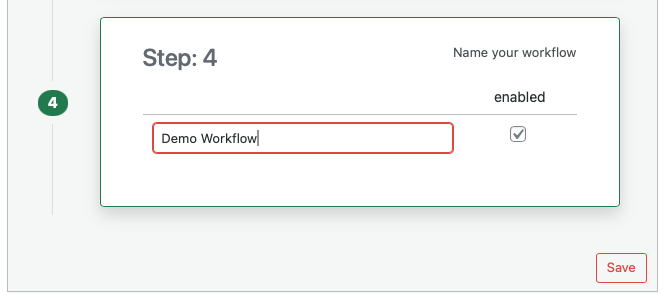
Step 6: Name and Save (Step 4)
- In the Name your workflow field, enter a clear name so you can find it later in the workflow list.
- Check enabled if you want the workflow to run. If you leave it unchecked, the workflow is saved but will not run until you enable it.
- Click Save.
The workflow is now saved. It will run whenever the trigger fires and all conditions are true. To change it later, click its name in the workflow list. For more on triggers and conditions, see Triggers and Conditions. For action types, see Actions.