Disciple.Tools User Documentation
Adding a New Field
Accessing Add New Field Functionality
WP Admin > Customizations (D.T) > [Record Type] > Tiles > [Tile] > Add New Field
To access the add new field functionality, follow these steps:
- Navigate to the WordPress Admin dashboard of your Disciple.Tools instance.
- Click the settings icon (⚙️ on desktop, ☰ on mobile) and select Admin.
- From the main left sidebar, click on Customizations (D.T).
- Identify and select record type to be updated.
- Navigate to
Tilestab. - Identify tile where field is to be added and click on tile to expand and display field list.
- Click
add new fieldoption at the end of field list.
Adding New Field Workflow
To add a new field:
- Expand a tile by clicking the plus sign (+) next to its name.
- Click add new field at the bottom of the expanded tile.
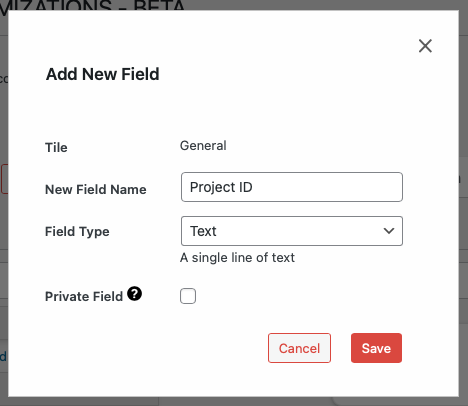
- Fill in the field details; which typically include:
- New Field Name: Display name for the field.
- Field Type: Type of data the field will store.
- Private Field: Field will only be visible to owner.
- Additional settings specific to the field type.
- See following section for examples of additional settings by relevant field types.
- Click Save to add the new field.
Additional Settings By Field Type
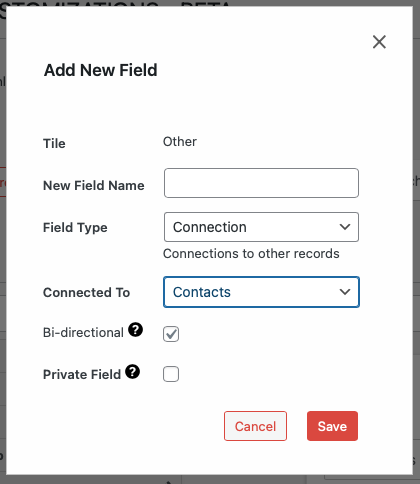
Connection Field Type
Supports relational connections with other record types, with the following additional settings.
- Connected To: Record type which new field will establish a connection with.
- Bi-directional: If checked, relationship to be established operates in both directions between records. If unchecked, then relationship direction enforced between parent to child.
- Field Name When Shown: Field name label to be shown within target record type.
- Hide Connection Field: If checked, connection field to be hidden within target record type.