Disciple.Tools User Documentation
Modifying Tiles
Accessing Tile Editing Functionality
WP Admin > Customizations (D.T) > [Record Type] > Tiles > [Tile] > Edit
To access the tile editing functionality, follow these steps:
- Navigate to the WordPress Admin dashboard of your Disciple.Tools instance.
- Click the settings icon (⚙️ on desktop, ☰ on mobile) and select Admin.
- From the main left sidebar, click on Customizations (D.T).
- Identify and click on record type to be updated.
- Navigate to
Tilestab. - Click the edit pencil button, next to the tile to be modified.
Edit Tile Workflow
You can update the label and visibility of any tile.
To edit an existing tile:
- Click on the edit icon next to the tile name in the Customizations menu.
- Update the tile details as needed:
- Label: Change the display name for the tile.
- Description: Update tile summary description.
- Translations: Click on the translation button next to both label and description fields, to capture different languages. A total count of translations is also provided as part of the button label.
- Hide Tile: Hide the tile from the record details page.
- Visibility: Click on the
Legacy Settingslink to access advanced visibility options.
- Click Save Button to capture changes.
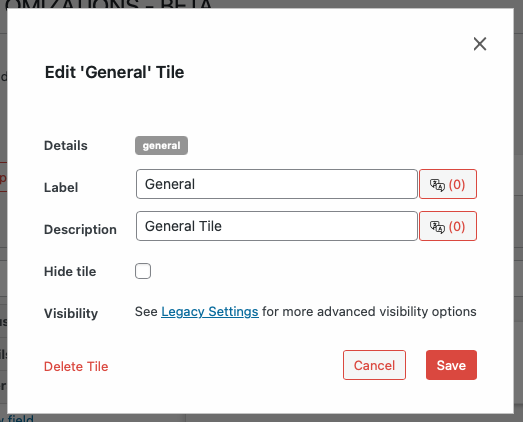
- Click Delete Tile to remove tile from record type.